See the particles, fix and load a part
Simulate can show the actual particles behind the water surface, coloured by speed or by how crowded they are, and says when the water has settled. New Fix and Load tools hold one face of a part and push on another, then show how it bends, with an honest accuracy estimate and a Cantilever demo next to beam theory.
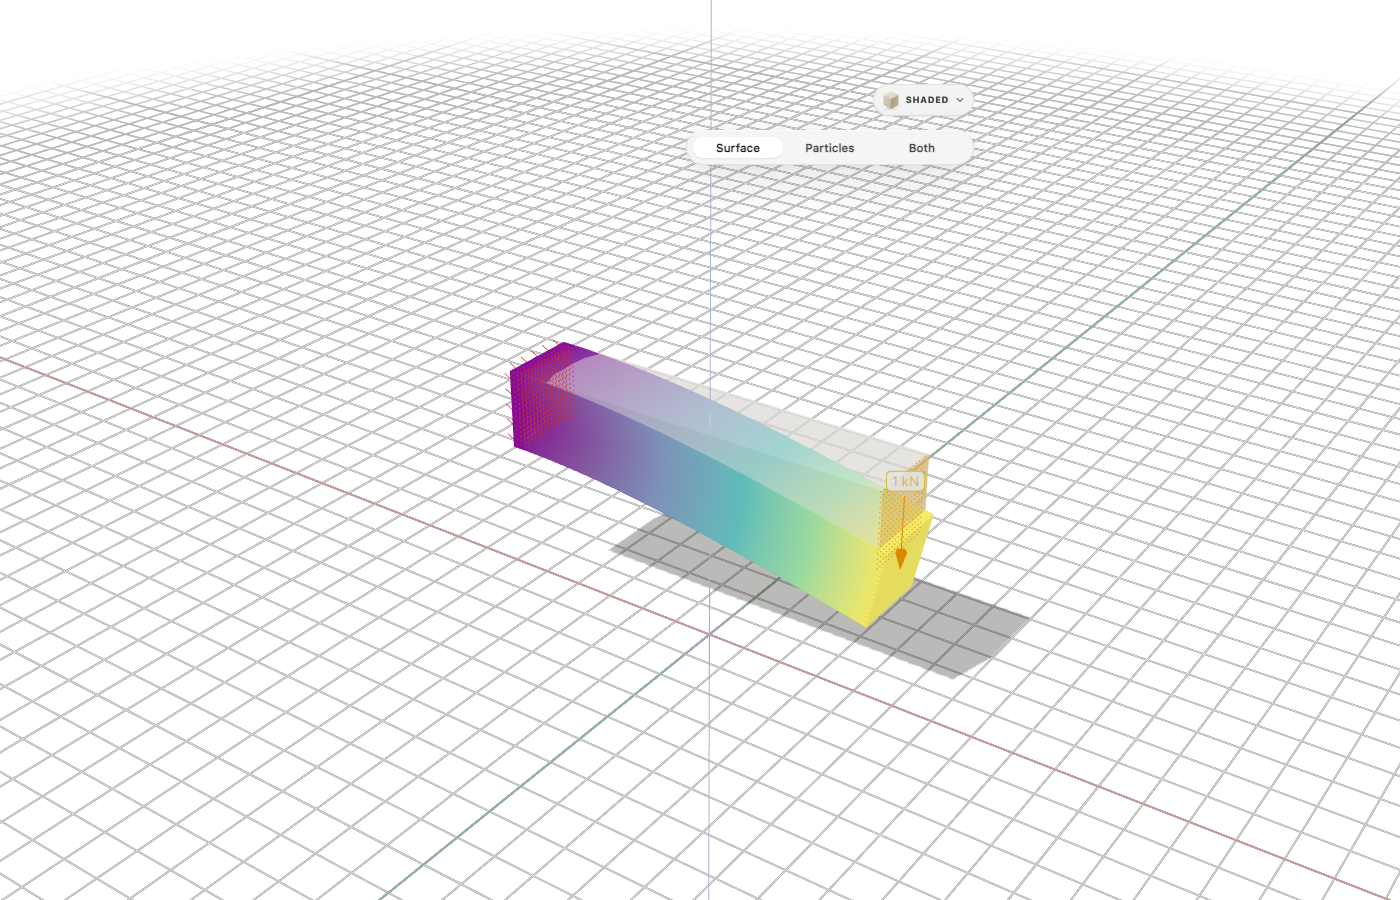
A steel bar bending under its load
The Cantilever demo after it has settled: the bar coloured by how far it moved, its bend drawn 100 times larger over the straight bar, the fixed end hatched and the 1 kN load arrow at the tip.
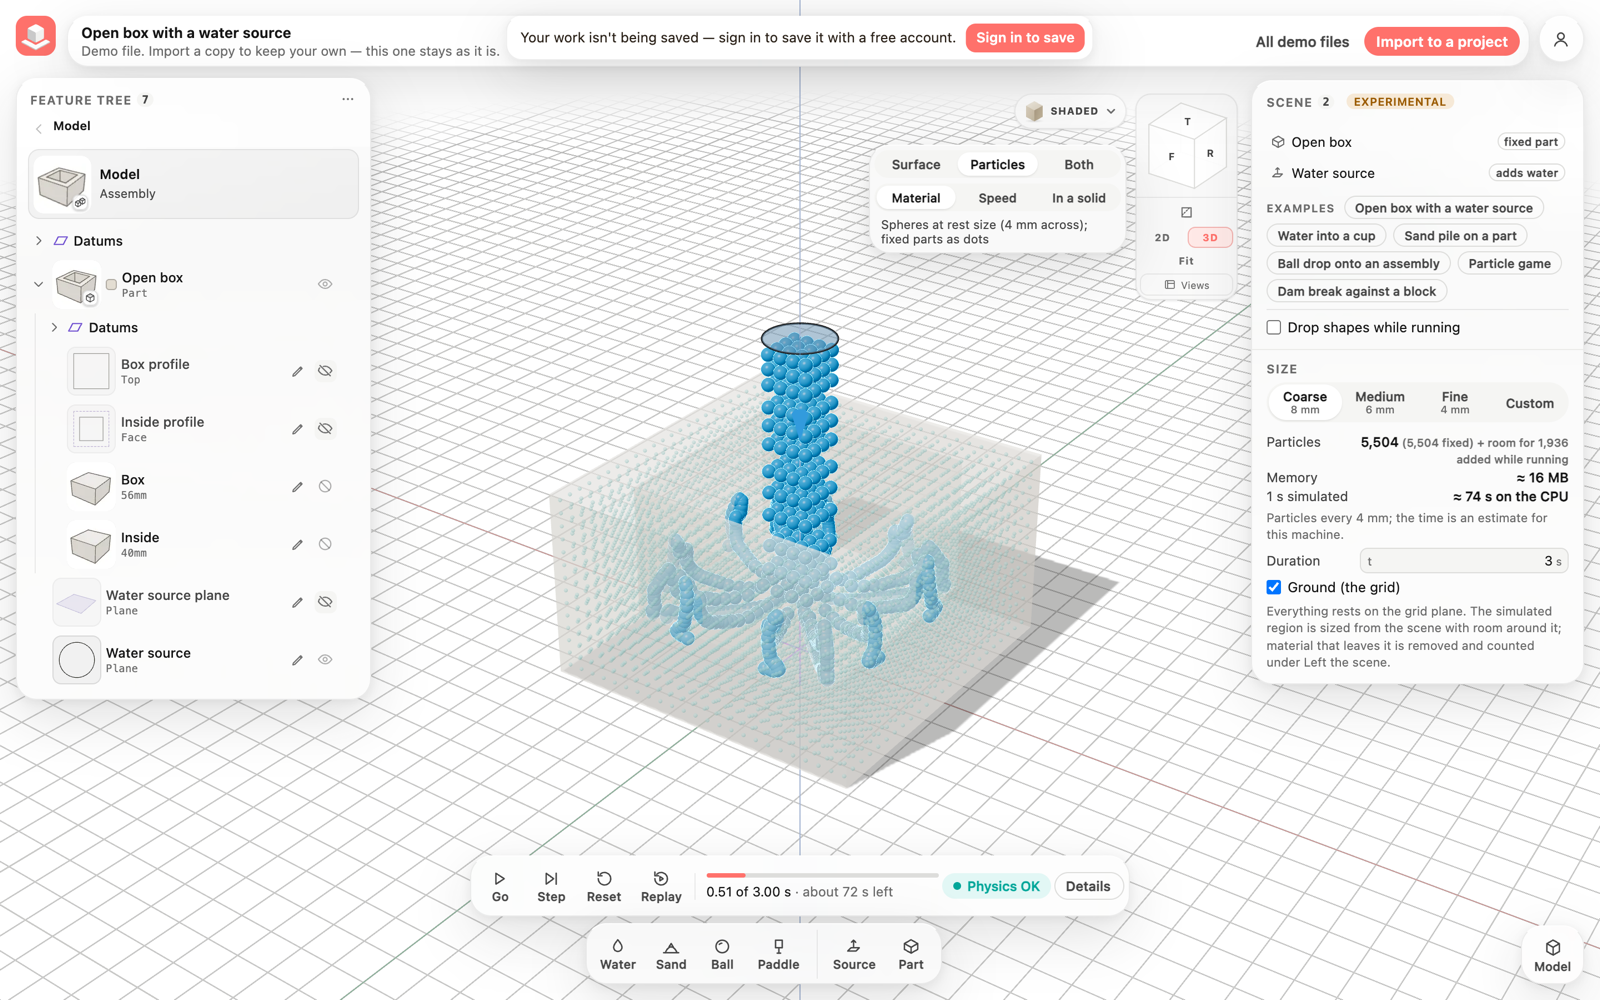
The Particles view
The open box mid-pour: the jet and the water in the box as particles; the box as small dots.
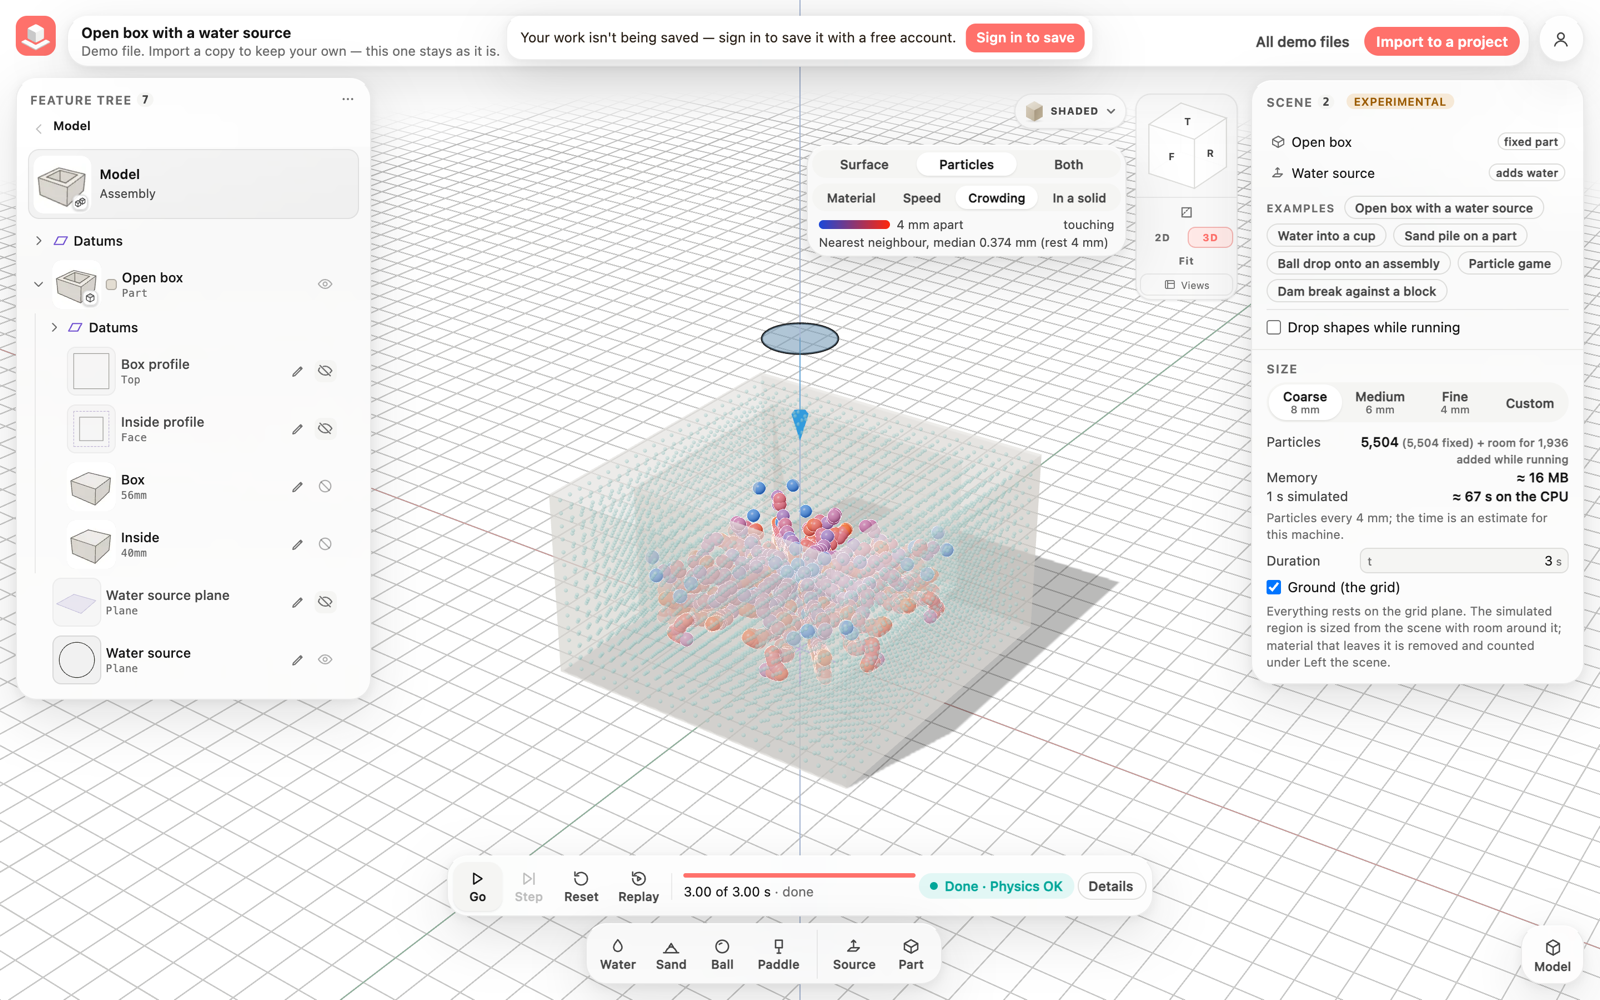
Crowding
After the water settles: the jet’s last particles are blue (normal spacing), the bunched water in the box red.
Fix a face, load a face
Hold a part where it is clamped and push where the force goes, the way you would set up a bending test. A fixed face holds the material just under it still, so the rest of the part bends from there; a load spreads its force over the face by area. Both follow the face in your model: edit the part in Model and they come along.
The part becomes a free body of its own material, so choose the material in its properties: steel, aluminium, ABS and the other solids in the list.
- Model a part, for example a long rectangle extruded into a bar, and press Simulate.
- Press Fix on the bottom bar and click the end face of the bar in the view. It is tinted and hatched; the part is now a free body.
- Press Load and click the other end face. A 100 N arrow appears on it.
- In the part's properties, under Loads, set the force, choose Along a direction and enter 0, 0, -1 to push down, and pick how it is applied: At once, Ramped over a time, or At once at a time.
- Press Go.
Read the result
A scene with a load runs until the part has come to rest and stops there, so the shape you see is the settled one. Results colours the part by how far each point moved, or by von Mises stress, with a legend. A steel bar bends a fraction of a millimetre, so the Deformation buttons draw the bend 10, 100 or 1000 times larger; the numbers stay the computed ones.
The Results panel reads how far each loaded face moved, next to the beam-theory answer in the demo, each support's reaction, the balance between the reactions and the loads with the part's weight, and the largest stress. The ⓘ button explains how each number is computed.
- Open Demo files, then Cantilever: steel bar under a tip load under Simulation. The first time in a session, press I understand, open Simulation.
- Press Go. The run stops by itself when the bar has settled, after a few milliseconds of simulated time.
- In Results, compare Tip with theory, switch between Displacement and von Mises stress, and try Particles at the top of the view to see the particles coloured the same way.
How accurate it is
Simulate computes the part as particles on a grid, and a part only a few grid cells thick comes out softer than it really is. The demo's 20 mm bar is 8 cells thick and bends about 29 % more than beam theory; a 10 mm steel bar in our tests bends about 68 % too far at 4 cells, 25 % at 8, 15 % at 12 and 10 % at 16, closing in on theory as the size gets finer, at a higher computing cost. Results warns when a part is fewer than 4 cells thick. The supports' reactions balance the loads at every size.
Results tells you this for your own part: a chip under its heading reads Rough, Indicative or Closer with the expected error for the number of cells across the thinnest loaded part, estimated from those checks, and a line reminds you that these are early-preview numbers, for comparison only and not for design decisions. The ⓘ button shows where the estimate comes from. Other shapes and loads may differ.
Fixed faces and loads run on the CPU engine for now: a scene that has them runs there even when the GPU is chosen, and says so. A face must be flat. The demo settles in about 40 seconds on a fast desktop.
See exactly what the engine computed
The water and sand you normally see are surfaces drawn around the particles. The Particles view drops that reconstruction and shows the particles themselves, each as a sphere as wide as the particle spacing, so a gap in the material is a gap on screen and a clump is a clump. Both keeps the surface and shows the particles underneath it.
Colour by Speed shows where the material is still moving. Crowding shows where particles have bunched together instead of spreading evenly: at rest neighbours are one particle spacing apart, and red means they sit almost on top of each other. In a solid shows the particles that have gone into a fixed part's walls or floor, with how many there are, so you can judge how well a container holds what you pour into it.
- Open Demo files, then Open box with a water source under Simulation.
- Press Go, and while the water pours choose Particles in the Surface | Particles | Both switch under Shaded.
- Choose Speed to colour the particles by how fast they move; the legend shows the scale in mm/s.
- Choose Crowding to see where particles bunch together; the legend gives the median distance to the nearest neighbour against the rest spacing.
- Choose In a solid to see the particles that have gone into the box's walls and floor in red, with their count.
- Press Pause, then Replay: the switch and the colours work on the recording too. Choose Surface to go back to the usual look.
Has it settled?
Open Details while a run plays or after it ends. Settled? says Still moving with the material's typical speed, Settling while it slows down, or At rest with the time it came to rest. At rest means the typical speed has stayed below one particle cell per second for a tenth of a second of simulated time.
- Run a scene, for example the open box with its source, and open Details in the run bar.
- Read Settled? under Steps. To see the water come to rest in the open box, set Duration to 3 s in the scene's settings before pressing Go.
Limits
Particles are drawn at their rest spacing, not at their current size. Speed in Replay is measured between recorded frames, so it is an average over the time between them. In a solid looks only at fixed parts.
Simulation is still experimental. The particle view makes its current limits visible: in the open box demo, the poured water bunches together (Crowding shows it red), so once settled it stands lower than its volume should fill, and some of it sits a couple of millimetres into the walls and floor. These are known engine limits being worked on.
Everything in this release
Added
- Simulate has Fix and Load on the bottom bar. Fix holds a flat face of a part still, like a clamp; Load pushes on a flat face with a force in newtons or a pressure in pascals, into the face or along a direction you set, at once, ramped over a time, or starting at a time. Click the face in the view; the part becomes a free body of its material, and its properties list its fixed faces and loads.
- A scene with a load runs until the part has come to rest, then stops: the settled answer of how it bends. Turn Run until settled off in Results to watch the motion for the whole duration instead.
- Results colours a loaded part by how far it moved or by its von Mises stress, with a legend in mm or MPa, and draws the bend 10, 100 or 1000 times larger on request. It reads how far each loaded face moved, the largest displacement and stress, and each support's reaction against the loads and the part's weight.
- Results shows how far a loaded result may be off, estimated from our own checks against beam theory: Rough, Indicative or Closer with the expected percentage (displacements read too large on a coarse size; the supports' reactions are right). Every loaded result says it is an early preview, for comparison and not for design decisions; ⓘ explains where the estimate comes from.
- Results tells you when a fixed or loaded part is fewer than 4 grid cells thick at the scene's size: too few particles through it for an accurate bend. It still runs; choose a finer size for a closer answer.
- In the Particles view, a loaded part's particles can be coloured by Displacement or von Mises stress too.
- New Simulation demo: Cantilever: steel bar under a tip load, a 100 mm steel bar with a 20 × 20 mm section fixed at one end with 1,000 N at the other, its result next to the beam-theory answer. At the demo's size (8 cells through the bar) the simulation bends it about 29 % more than theory; finer sizes come closer.
- A Surface | Particles | Both switch sits under the view's rendering style while you simulate (on a phone, above the Add bar). Surface is the usual look; Particles draws every particle as a sphere at its rest size; Both draws the water and sand surfaces over their particles.
- In Particles and Both you can colour the particles by Material, by Speed (blue at rest to red at the fastest speed of the run, with the scale shown), by Crowding (blue when a particle's nearest neighbour is a full particle spacing away, red when particles sit on top of each other, with the median spacing shown) or In a solid (red where water or sand has gone into a fixed part, with the count). Fixed parts show their particles as small dots so you can see inside them.
- The switch works while the run plays, when it is paused and in Replay, where speed is taken from the recorded motion.
- Details has a new Settled? row: Still moving, Settling or At rest, with the material's typical speed, so you know whether a lumpy surface is still moving or is how it will stay.
- Water surfaces no longer show small pits where a single particle is missing from the top layer.
